Clover- Fiserv Connect online payment Integration and Send Payment LinkWorkflow
Step 1: To integrate please click on Clinic and Staff Settings >>>> Marketplace >>>>Clover Connect >>>>click on configuration details and add your Clover Connect credentials.
Please contact VETport support team with any question and we will be happy to help

NOTE: To add an online payment link, You have to contact the Clover Connect team and get the Hpp connection URL and credentials for the same.
The Portal will look like this:
The Portal will look like this:
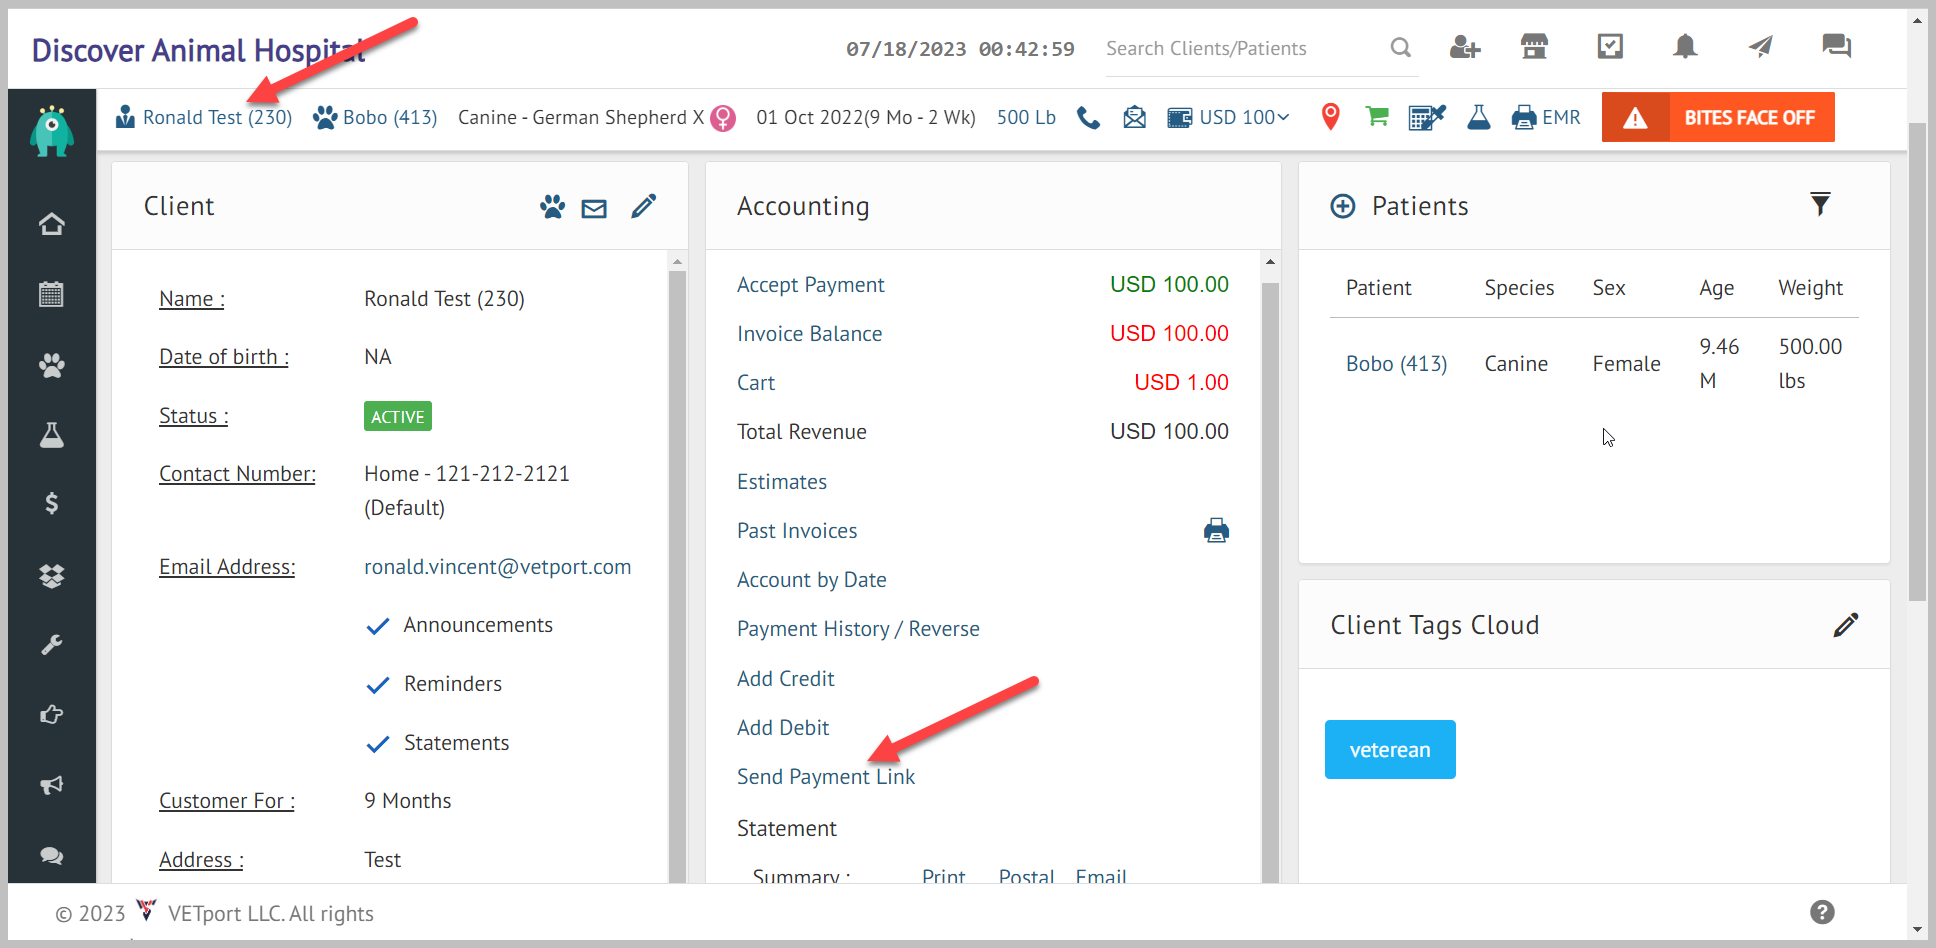
Step 2: Send payment to the customer using email.
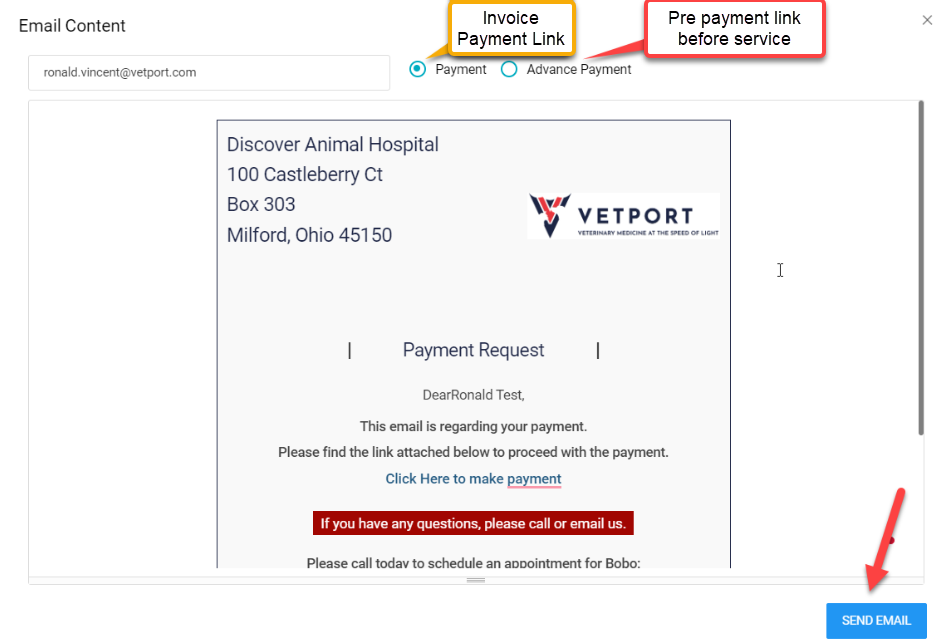
Click on the Client Name >>>>>Send Payment Link>>>>>Select the Payment option or Advance payment to be received from the client>>>>> then click on Send Email.
The email address can be edited if the link has to be sent to another email address
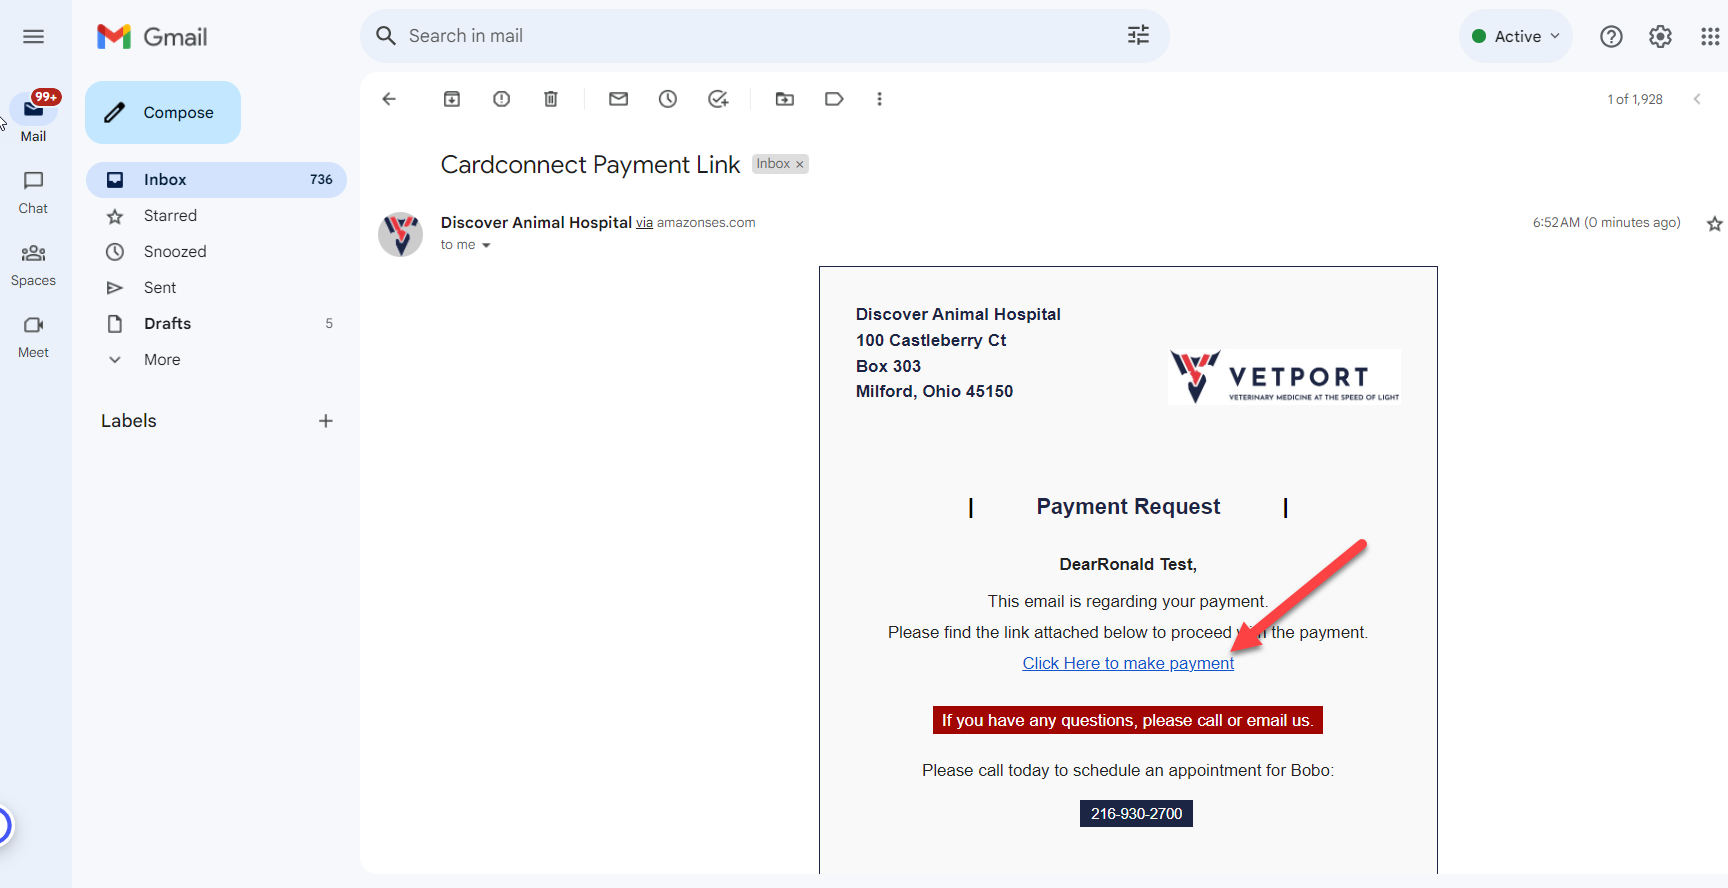
Step 3: Once the payment link is sent to the customer, They can view their email inbox.
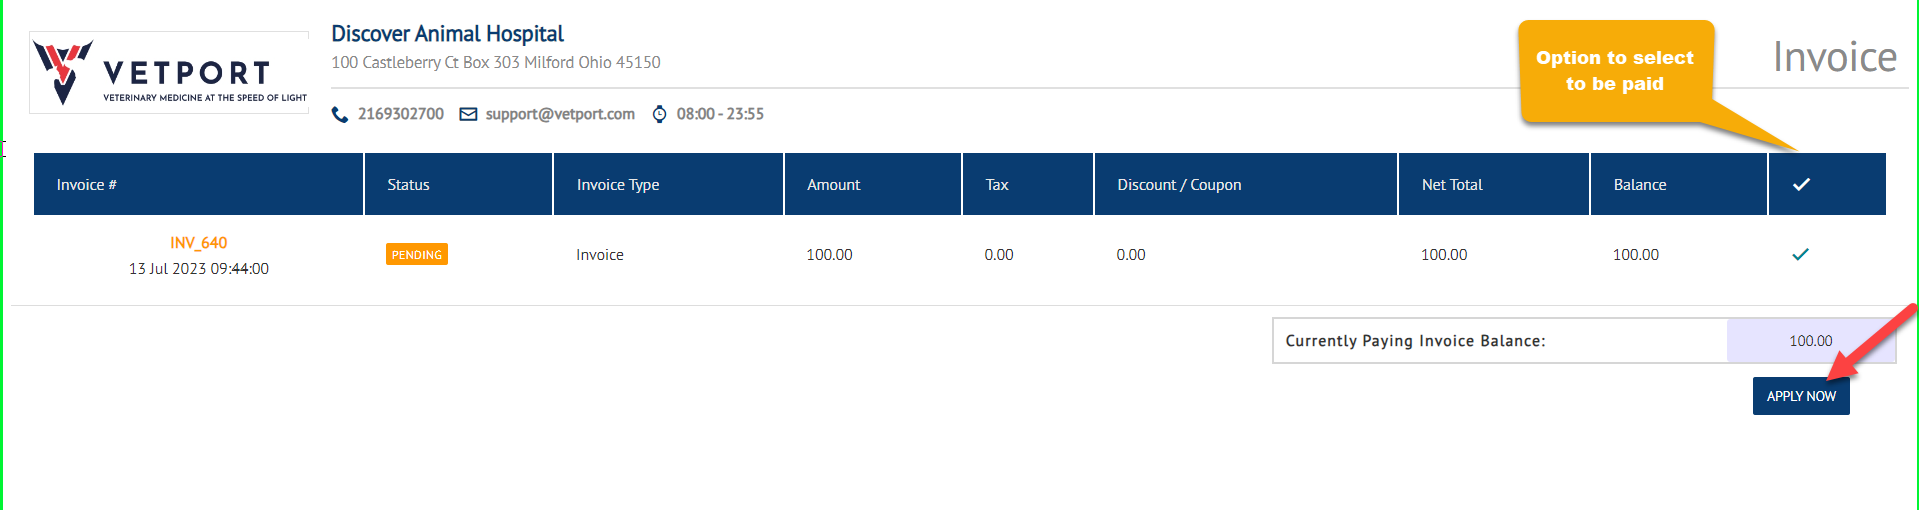
The customer should click on ( Click Here to make payment ) hyperlink>>>>>Select the invoice to be paid>>>>Click on Apply now>>>>>Clover connect gateway page and customer add their card information>>>>click submit payment.
All the pending invoices will show up once is clicked and the customer can select which invoices they want to pay.
PLEASE DO NOT CLOSE THE VETPORT PAGE OR CLOVER CONNECT PAGE UNTIL PAYMENT COMPLETION
Customers add their card information on the payment page>>>>>Click submit payment.
Once the payment is completed receipt will be generated.
Related Articles
Clover - Fiserv Connect Machine Integrations and Taking Payment Swiping Card Workflow
Step 1: To integrate please click on Clinic and Staff Settings >>>> Marketplace >>>>Clover Connect >>>>click on configuration details and add your Clover Connect credentials. Please contact VETport support team with any questions and we will be happy ...NextGen - How to print an EMR and send email to customer ?
1) Navigate to the patient's account and click on the print EMR icon as shown below. 2) Select all the information to be printed by using the checkboxes and click on "Merge / Sort All SOAP from Selected Encounter". 3) Click on the print option to ...Next Gen - Online Appointment Booking
Integrate online booking app from Market Place: Step 1: Go to "Set up" Step 2: Select "Market Place" Step 3: Select "Online Appointment Booking" Step 4: Click on "Integrate" Step 5: Please update the emergency contact number Step 6: You can share ...IDEXX Vet Lab Station - In House Equipments Integration process.
VETport integration with IDEXX reference equipment via IDEXX Interlink and Vet Lab Station - IVLS - provides for a fluid workflow and tight integration with VETport's electronic health record Initial Setup by IDEXX Laboratories at your clinic Contact ...NextGen - How do I send receipt to the customer?
1) Please click on payment history/ Reverse under the accounts tab. 2) click on the receipt to be sent via email / to be printed. 3) Click on send email / print.