NextGen - How does Inventory FACILITY works
1>> Facility: is a feature to add and receive inventory stock directly on the facility and transfer it to the clinic in-hand stock when required
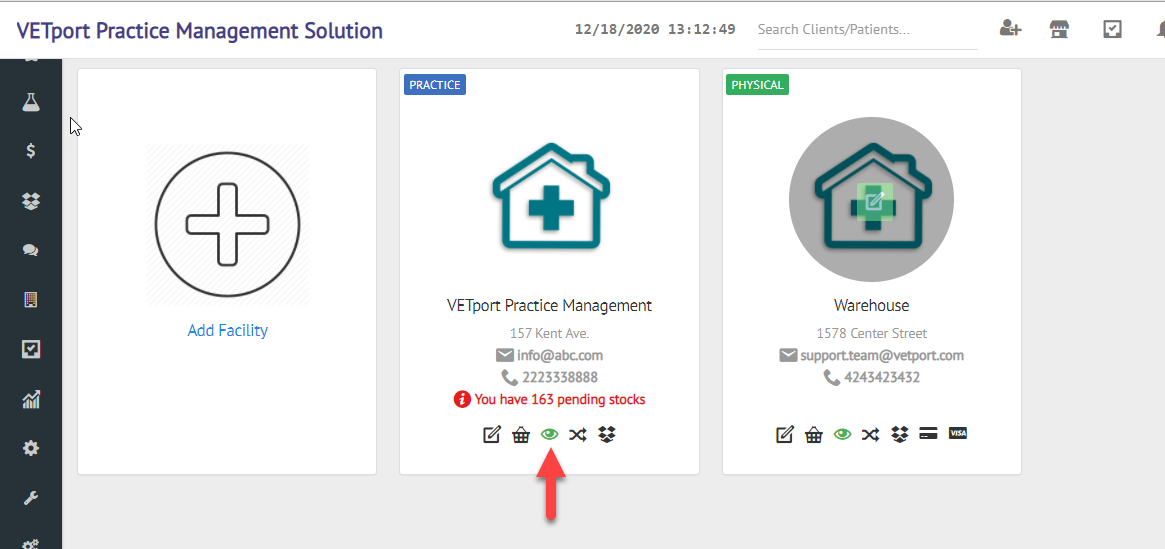
NOTE : When the Inventory is enabled from the Clinic set up, Automatically a Facility is created for the clinic as shown below
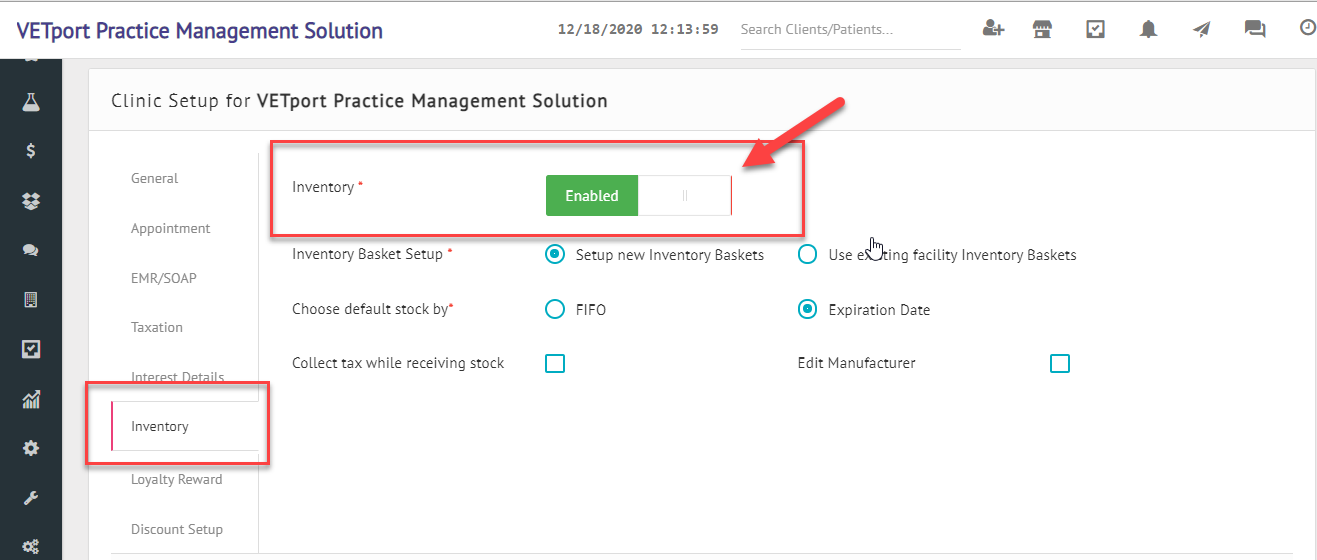
To enable inventory Go to Set up >> Organisation >> clinics >> Settings >> Inventory >> Enable inventory
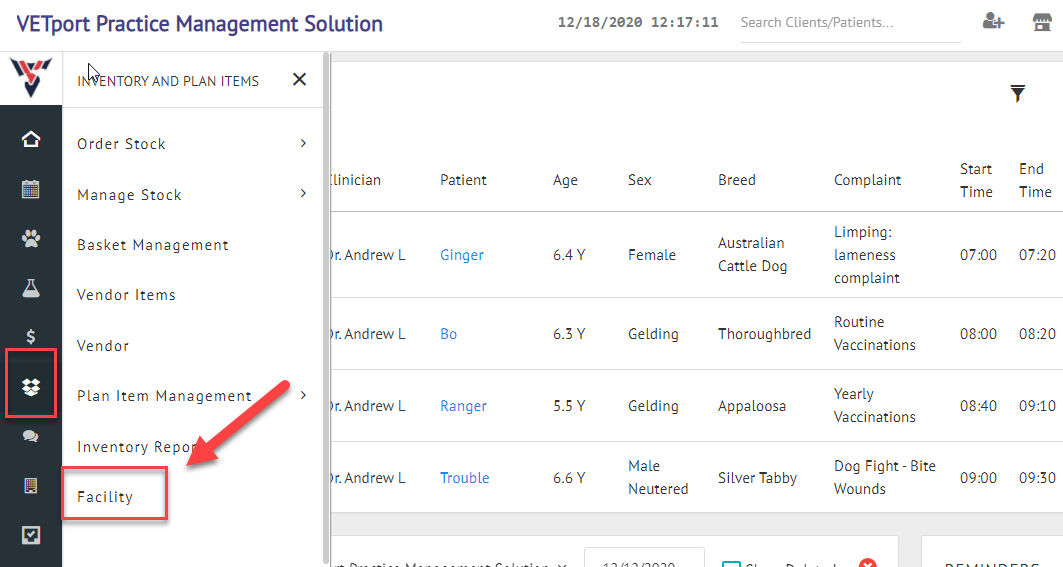
2>> Once the Inventory is enabled, Please go to Inventory and plan items >> Facility. and check if the facility is created with the same name. as shown below
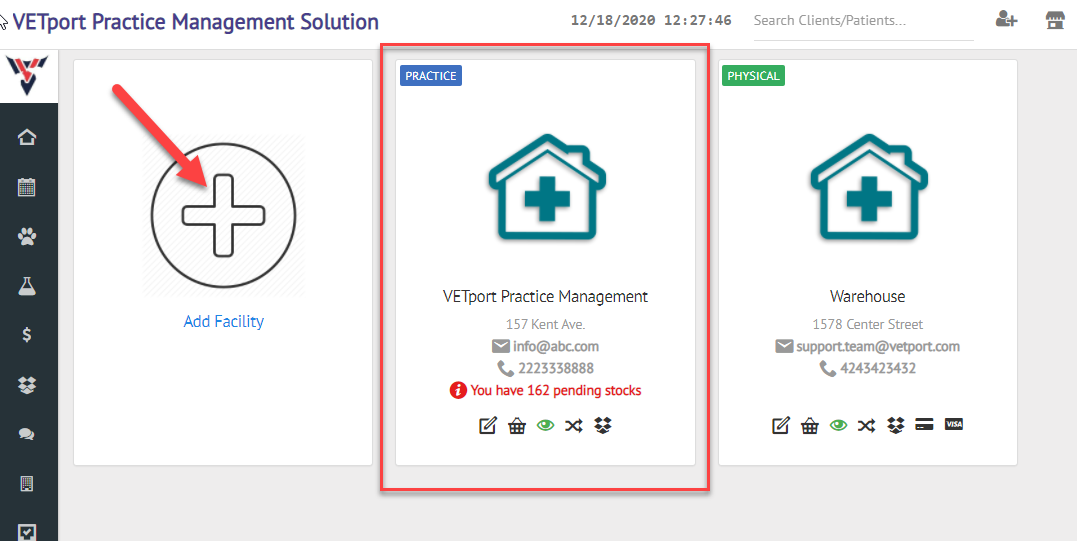
4>> NOTE : Facility that is automatically created is a Clinic facility
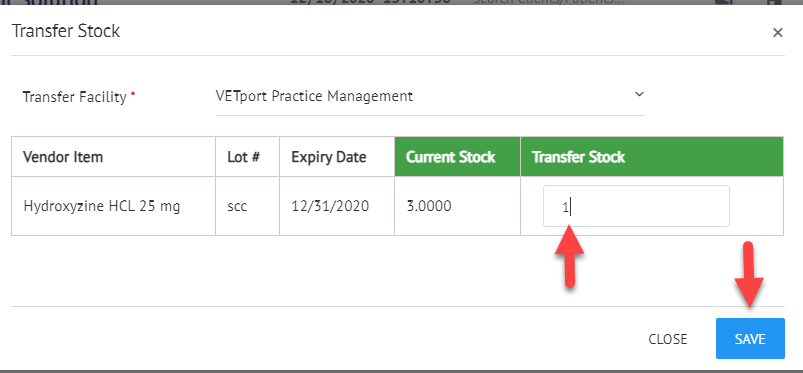
Choose the Transfer Stock Qty as per your choice on the below page
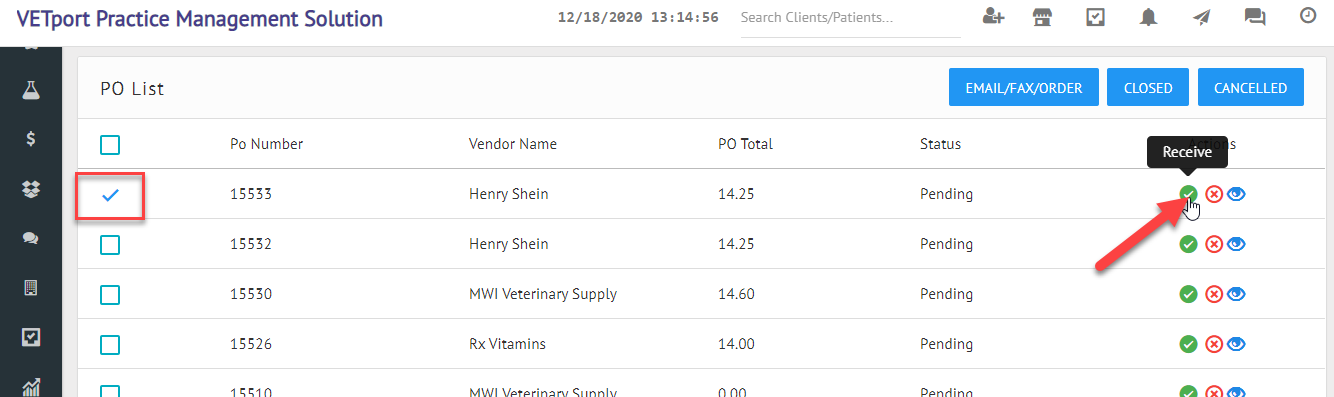
13>> Go to the Clinic Facility and click on the Stock icon and Receive the stock on the Clinic facility as shown below.
Once the stock is received on the Clinic facility, you will be able to see the stock under View current stock page for the clinic and use it accordingly for the patients.
NOTE : When the Inventory is enabled from the Clinic set up, Automatically a Facility is created for the clinic as shown below
To enable inventory Go to Set up >> Organisation >> clinics >> Settings >> Inventory >> Enable inventory
2>> Once the Inventory is enabled, Please go to Inventory and plan items >> Facility. and check if the facility is created with the same name. as shown below
4>> NOTE : Facility that is automatically created is a Clinic facility
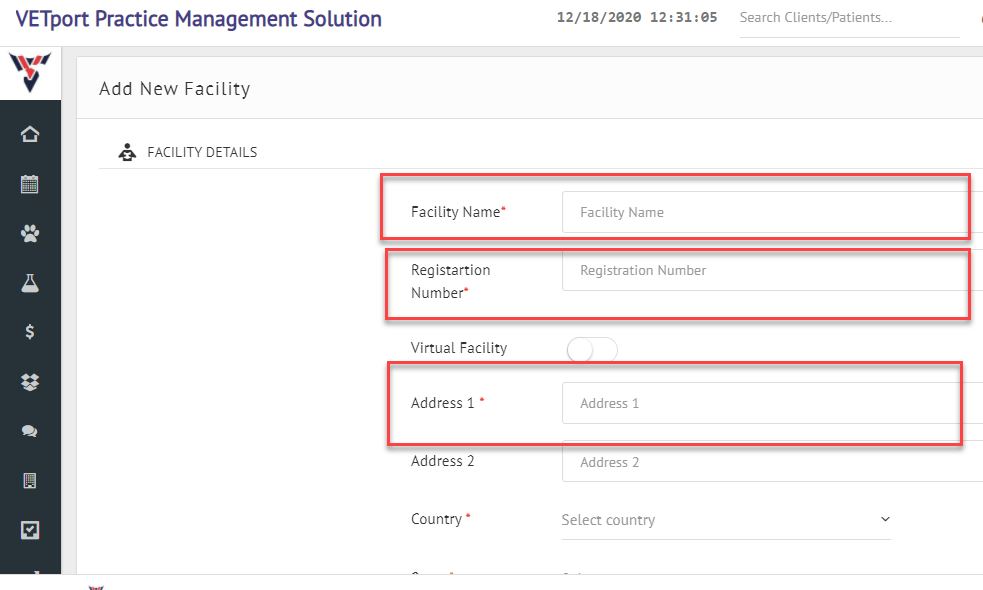
5>> If you wish to create a Virtual Warehouse or facility, please click on Add Facility as shown above
6>> Once clicked on Add facility, please enter the Virtual Facility name and other mandate details as shown below
6>> Once clicked on Add facility, please enter the Virtual Facility name and other mandate details as shown below
7>> Once the Virtual facility is created, you can name it as Warehouse for example as shown below

You will be able to receive the Stock to the Virtual facility with Purchase Order(PO) OR without Purchase order(PO)
NOTE: You will be able to receive the Stock for ONLY those Vendor items are Copied to this specific Virtual facility.
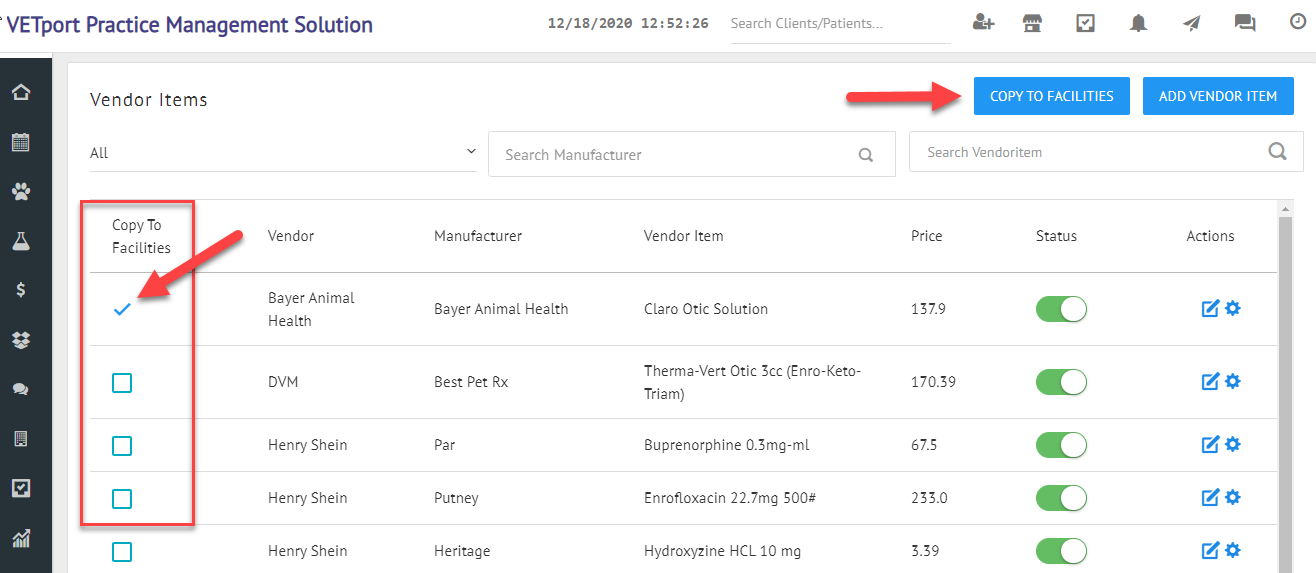
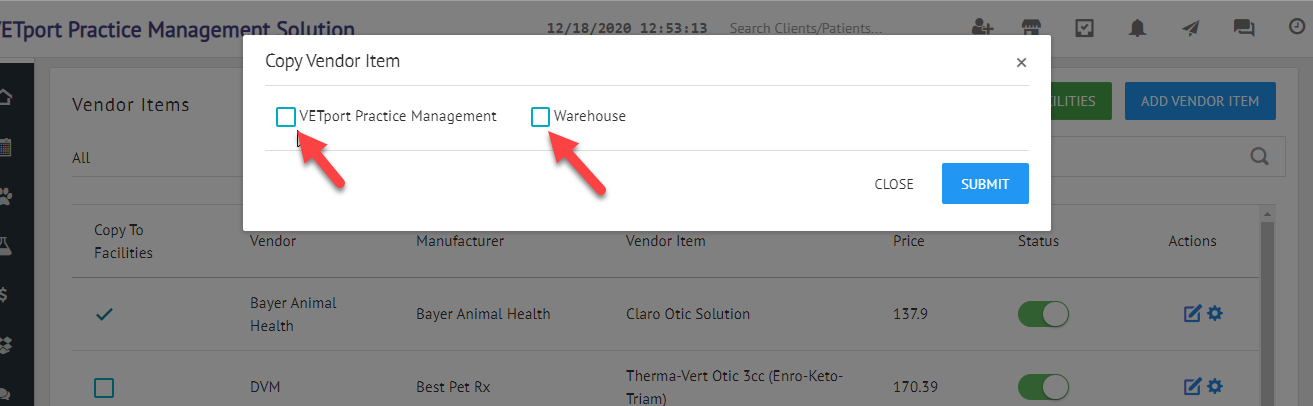
Steps to copy Vendor items to a specific facility or Warehouse,
Please go to Inventory and plan items >> Vendor items >> Click on Copy to Facility and move the vendor item to the desired facility.
8>> After the Vendor items are copied to the specific Virtual facility, you will be able to receive the Vendor item DIRECTLY on the Facility(Warehouse),
NOTE : You can receive the stock with Purchase order(PO) and without a Purchase order(PO) as shown below
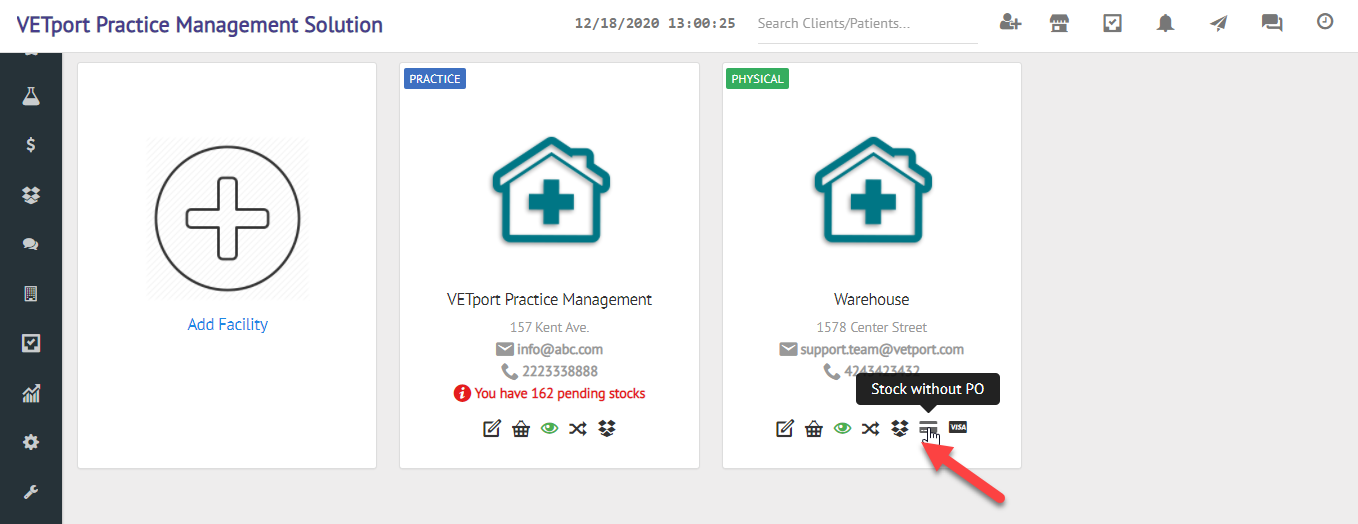
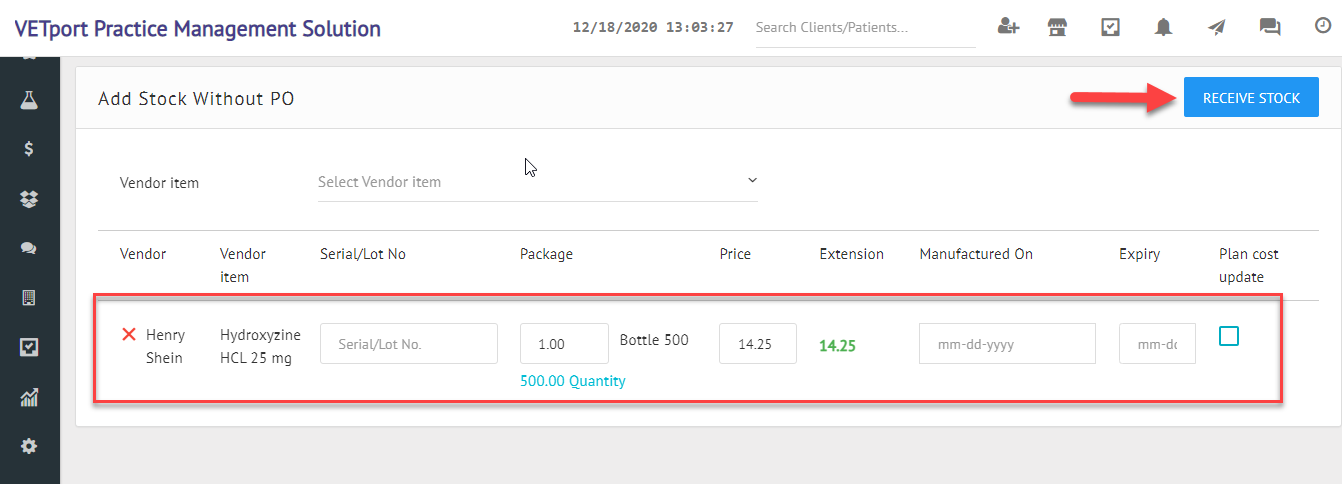
9>> For example now adding a Stocking without PO, Search for the Vendor item that you have added to the Virtual facility(Warehouse)
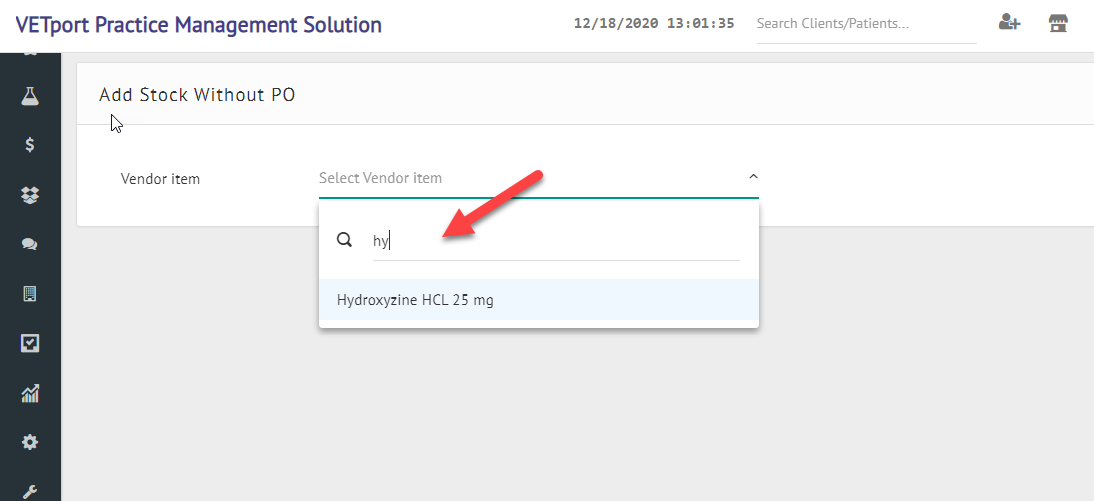
10>> Next step is to enter the Vendor item stock details and click on Recive stock
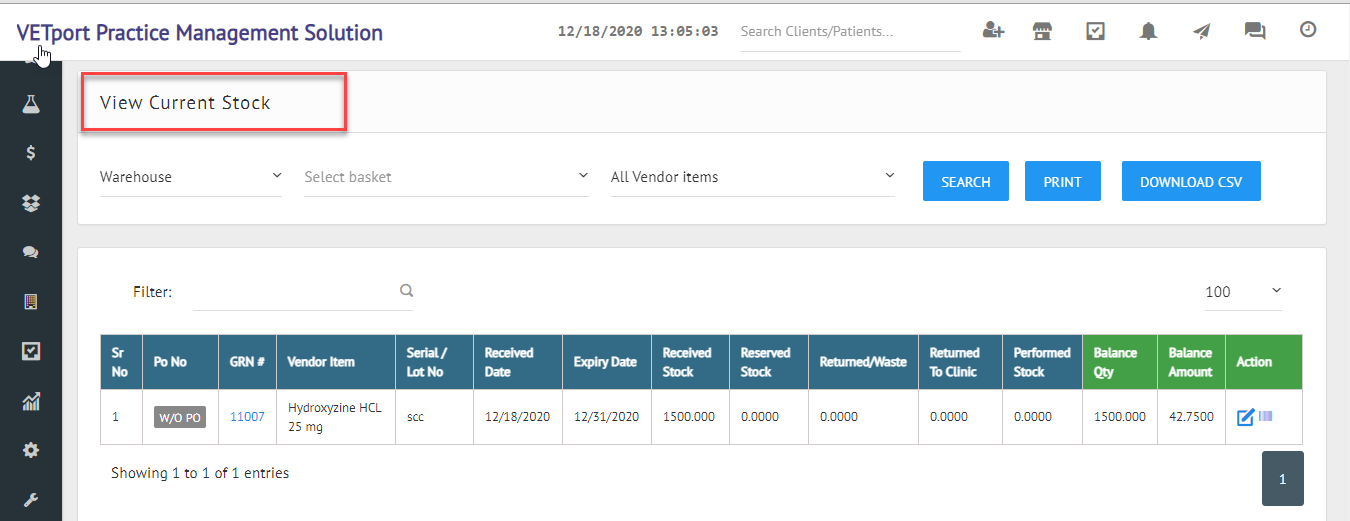
11>> Once the stock is entered you will be able to see the View current stock page ONLY for the Virtual facility (Warehouse) as shown below
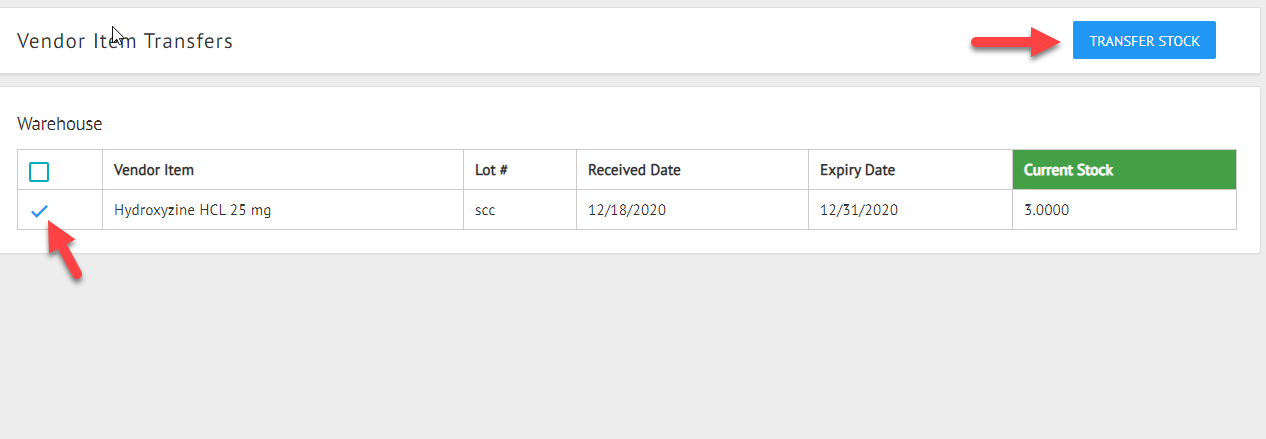
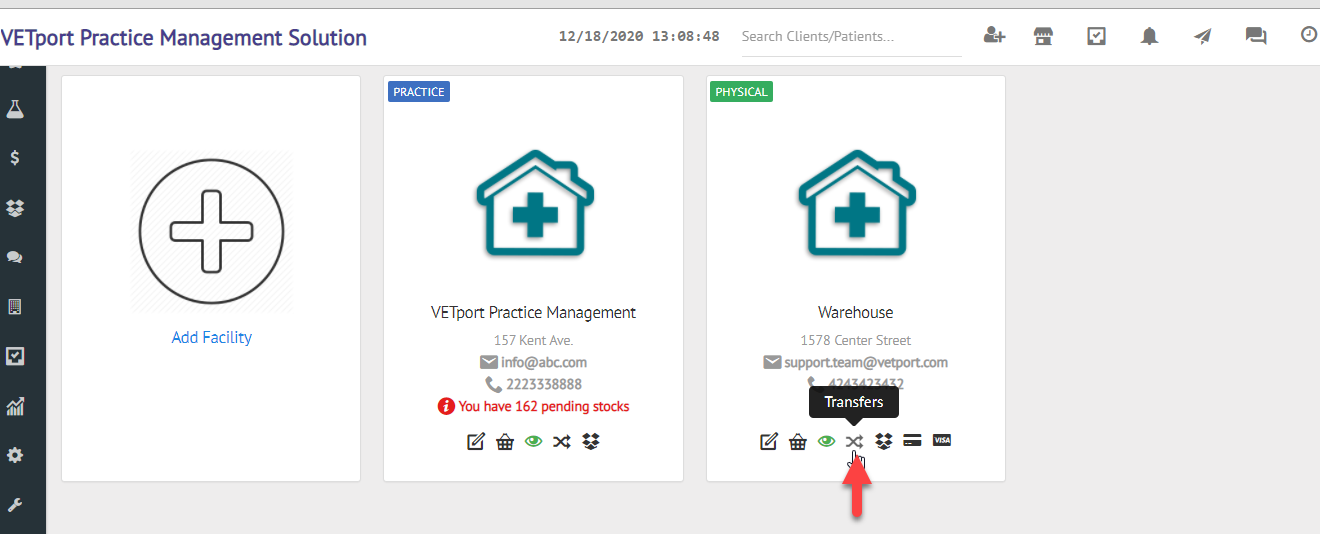
12>> Now the final Step is to move the stock from the Warehouse facility to Clinic Facility.
Click on Transfer under Warehouse facility and move the desired stock to the Clinic facility as shown below
You can also select the Vendor items Qty for Transfer and click on Transfer stock
You will be able to receive the Stock to the Virtual facility with Purchase Order(PO) OR without Purchase order(PO)
NOTE: You will be able to receive the Stock for ONLY those Vendor items are Copied to this specific Virtual facility.
Steps to copy Vendor items to a specific facility or Warehouse,
Please go to Inventory and plan items >> Vendor items >> Click on Copy to Facility and move the vendor item to the desired facility.
8>> After the Vendor items are copied to the specific Virtual facility, you will be able to receive the Vendor item DIRECTLY on the Facility(Warehouse),
NOTE : You can receive the stock with Purchase order(PO) and without a Purchase order(PO) as shown below
9>> For example now adding a Stocking without PO, Search for the Vendor item that you have added to the Virtual facility(Warehouse)
10>> Next step is to enter the Vendor item stock details and click on Recive stock
11>> Once the stock is entered you will be able to see the View current stock page ONLY for the Virtual facility (Warehouse) as shown below
12>> Now the final Step is to move the stock from the Warehouse facility to Clinic Facility.
Click on Transfer under Warehouse facility and move the desired stock to the Clinic facility as shown below
You can also select the Vendor items Qty for Transfer and click on Transfer stock
Choose the Transfer Stock Qty as per your choice on the below page
13>> Go to the Clinic Facility and click on the Stock icon and Receive the stock on the Clinic facility as shown below.
Once the stock is received on the Clinic facility, you will be able to see the stock under View current stock page for the clinic and use it accordingly for the patients.
Related Articles
NextGen - How to generate a report on Expired inventory items ?
1) Click on the inventory and plan items icon as shown below and then click on inventory reports. A > Click on inventory and plan items. B > Click on Inventory reports. 2) Click on EXPIRED INVENTORY ITEMS >> Select the dates and click on apply ...NextGen - How to enable Inventory from Clinic settings ?
1) Click on the setup icon as shown below. Navigate to organisation then click on clinics. A > Click on Setup. B > Click on Organization. C > Click on Clinics. 2) Click on the Settings icon as shown below against the clinic you would want to make ...NextGen - How to generate a report on Recived stock on inventory ?
1) Click on the inventory and plan items icon as shown below and then click on inventory reports. A > Click on Inventory and plan items. B > Click on Inventory reports. 2) Click on RECEIVED STOCK. 3) Select the dates > or specific basket and vendor ...How SES works ?
What is SES and how it works? SES stands for (Simple Email Services) If the clinic email is changed an email from Amazon SES will arrive at the new email address within the next 24 hours requesting confirmation of this new email address. You need to ...NextGen - How do I restrict my staff from accessing Inventory & accounting
1) Please click on the setup icon. Navigate to organisation then user groups. Click on Setup >> organization >> User group. 2) Under the User group to be restricted please click on the manage icon. Click on the Manage ( gear icon ) as shown below: ...